What is the Bundle?
In today's video, I'm going to show you how to use new products that are part of AE Juices I Want It All Bundle in Premiere Pro. And right now there's the Black Friday sale. So you can get the entire bundle for over 98 percent off. I've put a link below. Without further ado, let's go ahead and jump on in.
what is this bundle for? If you're a video editor, if you're a content creator, you edit music videos, any piece of internet content, there is going to be something in this pack that you can use. Now it works with both Premiere Pro and After Effects, and in this video, I'll be reviewing four products inside of Premiere Pro, and on Cyber Monday, I will be showing you three more packs inside of After Effects. My favorite part of the pack is you can go up to Window, Extensions, and open up the AEG's Pack Manager, and all of the packages are inside, nicely organized, so you can browse and find the products. You don't have to search for them on the hard drive. Since last year's sale, there's been over 20 new additions to the bundle, including light swipes, burning transitions, NFT constructors, 8-bit effects, and so much more. If you bought the bundle last year, and you're like, well, I don't wanna buy the whole new thing again, you can purchase the upgrade to get those extra new packs for just $79. All right, so that's the intro to the bundle. If you have any more questions about it, just leave a comment below. And now let me show you how to use my favorite packs.
Broken Glass
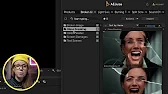
My first favorite new pack is Broken Glass. So let me go ahead and click on this. So here there are five categories. There's Broken Image, which already has the glass applied. My favorite is the Glass Breaking, because somebody can be screaming, and it creates the shatter effect. And then there's Glass Parallax. There's Screen Damages. And then there's also Text Breaking, which could be good for cinematic trailers where you want the glass to break. Let's use one of the Breaking Glass ones. So how do we get our footage inside? I'm gonna double-click on this, and it will download. And remember, you need to be connected to the internet. It'll import this as a MoGrid file. So what we need to do is go up here into the placeholder from Essential Graphics, and then from this hamburger menu, select this and Replace From Finder. And then we can select our video clip. And now you can see that we have our footage, and you will see that there is a Broken Glass sound effect. If you wanna change the start point, it's the way she punches exactly when the glass breaks.
So if I would just, you can go over here and change the end point. So you can hover over this and just adjust the time until it's right. I'm gonna do that right now.
- A few inches later.
- So I aligned it. Now I'm just going to cut off the first part here, press C and click and delete this bit off. And then I'm going to move this over and just cut here. To get an accurate preview of this effect, I recommend rendering it out so you can see it at full res. Now it does take longer in Premiere Pro, which is why I recommend using Broken Glass in After Effects because of the multi-frame rendering, which Premiere does not have. So if I press return or enter, it'll start to render out. And you can see it does take a bit of time. Here you can see the rendered out effect. So it looks really good, but it took like two minutes to render two seconds, which is too long. But the benefit of using in Premiere Pro is you don't have to go to another program. Grab a cup of tea while it renders. There's also text scenes. So if I move my play head here and I wanna use this broken text, I can double click to apply it to my timeline and it will download. So then here, this is also a motion graphics template. I can go in here and I can update my text to be, for example, Premiere Gal. And it also comes with a sound effect. There's even text texture if you want this on and you can adjust the background colors and all the camera positions. I think it's good. So I just rendered this out and this is what it looks like.
Light Swipes
Next up are the new light sweep transitions, but also I wanna mention that the seamless transitions, which are a part of AE juice are super popular. And if you wanna learn how that works, you can just click right up here. So the light sweep transitions, they're right up here and they're really, really cool. Like overlays of these different flashing lights and you can overlay them on top of action sequences or in music videos to just make it more dynamic. Like there's more visual information on screen to stimulate the viewer. So what I have here in my timeline is this motorcycle sequence.
And already the visuals are really cool, but to add those flashy light sweeps will just add so much more. To use these light sweep transitions, you can just move your playhead to the moment that you want to use it, and then you can choose one of the light sweeps. For this opening one, because the sound is like... I want to get something that kind of has a lot going on to underscore that musical sound effect. So let me move the playhead back here. For this one, I'm going to choose light sweep transition 46, and I'm going to double click and it will import directly at my playhead. And then I can zoom into the timeline and I can shift it over to start right when that music element starts. So now when we play this back.
It looks pretty cool and of course you can play with the blend modes. So next here I'm going to choose a different light sweep. Let's do number 52. So let's go ahead and double click this one and I will move this into place. I'm going to select it go up to opacity from effect controls and from blend mode. I'm going to choose linear dodge add.
And for these transitions, you don't actually need to put them at every cut between clips. You can actually overlay them just to add something to that clip. So right here at this moment, while he's driving in the super wide shot, there's a little ding in the music. So here we can add another overlay right at this moment, even though it's not a cut, right? It's just adding to the visual. So this is another flash one that works well for the ding. So let's go ahead and apply this one. Change the blend mode to add.
So now it looks like this. There we go. So let me pull up the light sweep final to show you how the final result looks.
So you can see that the light sweeps just really added so much more dynamism to the scene and I could see myself using them in a lot of music videos and commercials just to give that video an extra edge. So the next one is split screens, but first I'm Kelsey and if this video is helping you out so far, be sure to give it a thumbs up as well as subscribe. And also down below is my affiliate link. It's an exclusive offer, so in addition to getting 98% off this entire bundle, by using my link below you can get an additional 10% off and it helps support the gal community. Alright, now let's jump into the split screens.
Split Screens
For the split screen pack, just click on it to open it up and you can see there's a bunch of different categories here. There's animated frames and animated frames with grain. So if you want the frames that have kind of a little wiggle, you can use the movie file options or there's still frame options as well. So if you want it to just be a PNG file that you overlay on top of your footage, you can use the still frame versions. And then here is the same animated movies, but these are for vertical. And then beneath this, these are the still frame PNG options. So you have different choices. Do you want to use the MOV animated versions or do you want to use the PNG still overlays? I'm going to show you how to do it with the animated frames with the grain. As we scroll down here, you can see there's so many different variations. They even have some dollar signs, infinity loop, smiley face. I mean, this is super cool.
Let's just choose a two split screen for this example. So after it imports, you'll notice that mine shows a transparency grid. If yours is just pure black, it means that you don't have your transparency grid enabled. So you can click on this wrench tool and go down to transparency grid to turn it on. And now what we can do, because there's two video clips you want to put in here, let's move up this animated frames to video layer three. And I can go over to my demo clips here and import a couple of clips. So let's say we want to take this grass clip down here from effect controls with the clip selected. You can go in here and scale it down using these parameters and use the position controls here. But if you like scaling it in the window itself, you can select on motion in here. You can actually scale it down in the program window. Now it looks like we might have to do a mask here because it's bleeding over this edge. But let's add the other video clip first, because this top clip is covering up the other clip. We actually just need to create a mask on top of the second clip from opacity controls. Just select the four point polygon mask. And then from here, we can actually hover on the corner, press shift and scale this up. And then we can move this over. So it's intersecting with that black line. So we only had to create one mask. In this case, you may have to create multiple masks. It just depends on how many split screens you have.
So you can see the animated movie file is quite short and it doesn't cover the footage throughout. So if you wanted this to be longer, this is where it's easier to use the PNG file because you can just extend out a still image for however long you want. With this one, we actually have to duplicate it until however long we want. So select animated frame, press the alt key or the option key on a Mac and just click and drag and it duplicates it. So let's say this is the duration we wanted. Then I can press C and shift to cut off the excess clips here and then I will delete it.
So now we have this three second long segment with this split screen. I did the same thing with the vertical animated frame in a vertical sequence and it just took 30 seconds to do. So definitely check out these split screens. I think they're very useful and they're very hot right now.
Burn Transitions
There's a lot you can do with split screens. Up next is the burning transitions. Now there's six different categories here that you'll see. There's burning film transitions, which is actually film burning with a transparent background here. And then there's paper transitions. So it has a little bit different of a look compared to the actual film burning. And there's luma matte transitions. So if you prefer to use a track matte key effect to actually have two pieces of footage burned together, you can click right up here to watch how to use the track matte key. And then lastly, there's overlays. These will import in your timeline as MP4 movie files compared to the first categories here, which actually will create the effect for you using a motion graphics template. So let me show you how to use the motion graphics template versions. To apply one of the burning transitions as a motion graphics template, you need to click and lasso both of these clips in timeline and then go to the AE Juice pack manager. And let's say we want to use burn number four. Let's double click on this. And what this will do is just create this weird like media placeholder thing. And there's one more step you need to do. You're going to have an AE Juice folder that's automatically created anytime you download any of the clips. So it's all located in here. And you'll notice that there's number two sequence burning film transition four. And there's also one burning film transition. So what we're going to do is actually drag these sequences into the placeholders. And now we just need to render this out. You can press enter to render it out to get a full preview here. So I added some sound effects and some music and the burning transitions. And this is what it looks like.
Final Thoughts
So this was just a taster of four packs. You can see here there's so many products in the AEG's pack manager that comes with this bundle so even if you're like " I don't think I'm going to use any of these effects or maybe just one pack of it" you will still have access to all of these later on which you may need in the future. So it's still a great deal compared to just buying one pack solo. The whole bundle itself has everything included and if you're still not convinced they do have a free starter pack you can go here to the website and go to free plugins. I'll put a link just down below and you can download the starter pack which includes some of the liquid transitions, slides, and some simple transitions and some icons as well and it includes some sound effects. And on Cyber Monday I will be showing you three more different packs inside of After Effects so stay tuned for the video coming there. And remember my affiliate link below if you use my link to purchase the I Want It All bundle you will also get an additional 10% off the Black Friday sale price. Thanks so much for watching everyone and as always keep creating better video with Gal. See you next time, bye!