Intro
In today's video, I'm gonna share with you three different ways you can add popular animations to your subtitles. The first way is manually key framing. The second way is using text presets. And the third way is using AI. A special thanks to our friends over at Storyblocks for supporting today's video. I'm gonna share with you some of their text presets later on in the video. For now, let's go ahead and jump on in.
So first let's start inside of Premiere Pro.
Creating Captions in Pr

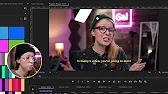
Here inside my timeline I have this snippet from a video and I use the text panel to auto-generate a transcript using AI. So when I play it back, you can see that the words are moving and each time I click on a word, it's time-coded to the playhead, so it's reactive. From here I can go to the captions tab and click on create captions from transcription and then hit create captions.
So now we have our captions in the subtitle layer and the best part is is that we can cut and split up these captioning tracks into new ones. So if we wanna split this one into two sentences that appear separately, we can actually make a cut on this caption. So press C and cut and now from the text panel we have two layers and we can go ahead and delete captions in Premiere Pro and then we can make this one just have captions in Premiere Pro, for example. And then we can listen back and use the rolling edit tool to move the cut point to exactly when I say it. Create fast and easy.
captions in Premiere Pro. Let's get started. All right.
Stylizing Captions
So from here we can stylize it. We can select one of the captioning layers, go to essential graphics and let's update the font to do Montserrat bold italic. And we can also move the position up so it's a little bit higher. In order to apply this to all the other captioning tracks, all we have to do is go up to track style and select create style. And we can just call this new demo for this example.
And now every single one is in the same position and it has the same style. So it's a basic caption, right? What if we want to add some animation? What if we want to have a color reveal on top? This is where we first need to convert the captions into a graphics layer.
Converting Caption to Graphic
So what we need to do is right click here next to subtitle and select add track and press OK. And I'm going to lasso and select these captioning tracks, press option and drag up to duplicate it.
Now I'm going to lasso and select these captions, go up to graphics and titles and select upgrade caption to graphic. And when you do that, it's going to create these captions above as a graphics layer. So now I'm going to bring this graphics layer down to meet the video clip beneath. And then I'm going to duplicate it again because we're going to add the yellow color to the one above. So press option key on a Mac or alt on a PC and drag up to duplicate it.
Mask Reveal Animation
So now with this clip selected, I'm going to go to my libraries panel and I'm going to change this fill to yellow. And then I can also save this as a new style and I can call it yellow Montserrat and press OK. But now we want to create that yellow reveal on top so we can go down here to the rectangle tool and we can click and we can draw a rectangle over top the footage, just a rough one that works. Then with the shape layer selected from central graphics, go to mask with shape and now it's a mask. So what we can do now is go over to effect controls and animate that rectangle from left to right. So from the shape layer, go to position. And here, let's actually move this position off frame like so. And then we can create a key frame by clicking this icon. And now we can move forward to when I say in today, in today's. So right here, we can then move the position over to reveal those words.
And then we can go through and then move it over key frame by key frame. So it will start to animate with what I'm saying. Now we can play it back and see how the reveal looks in today's video. You're going to learn. So this takes some time, right, because you're manually key framing the movement of the mask to what you're saying. But next, I'm going to show you how you can create a quick pop bubble preset that you can just copy and paste at all the cut points. And you don't have to redo it every single time. So between these cut points, I want to add a slight bubble pop.
Pop in and Out Animation

So first, we're going to lasso and select all these clips, right click and select nest, and the reason why we're nesting it so it'll be one layer is we're going to be applying an adjustment layer and applying an effect to that adjustment layer. If we didn't nest it, it would also apply the effect to my video clip beneath, which we don't want. So we can double click on the nest. And now we have all the captions as its own sequence here. So now let's go over to the project panel and we can right click new item adjustment layer and press OK and drag this on top of our footage here. So from here, we need to trim down the adjustment layer to the duration of the effect, which is going to be quite quick. One, two, three. Let's adjust this over one frame. So it's four frames in duration. So let's press option in the left bracket key. There we go. And then one, two, three, four. And then let's proceed and cut off this axis.
So right here at this adjustment layer point, we can press M as a marker point. So we know that that's in the center. And whenever we move it, it'll always snap back to that cut point. So from here, we can go to effects and search for transform underneath the store. Double click to apply it. Now we can go to effect controls. So from here, when we select transform, we want to make sure that the anchor point is in the center of the text so we can move this anchor point to be exactly in the center of the text. And then we can use the position to bring it back down to be aligned with the former place. So anchor point is now in the center. So now we can scale it and it will scale from the center. So the first animation is actually going to be an out animation. So we want it to start at 100. So let's set our first key frame and then let's move forward. And let's say we want it to pop up slightly first. So we'll do one oh five and then we can go one frame over and we can bring this down to 50. And we don't want it to go all the way down because we want the animation to be subtle here. We can create another key frame. So it's at 50. Then have it go up to one oh five and then back to 100. So now it looks like this kind of that like poppy style. So we can select all the key frames, right click and select Bezier to make it more smooth.
So now we can save this as a preset and we can right click save as preset and call it pop out and pop in and press OK. And of course, this will now be saved over here. Pop out, pop in that you can apply to future adjustment layers. But because we already have it here, all we have to do is press option, click and drag and release to duplicate this at every cut point just like this.
So it's a lot faster than having to manually do this each time. If you want access to this preset and the project file, you can join my Patreon community, which is called the editing room. A link is just down below. And this is the final result. In today's video, you're going to learn how to create fast and easy captions in Premiere Pro. Let's get started. So next up is using pre made animation presets.
Working with Text Motion Presets

If you haven't used it yet, Storyblocks now has a panel for Premiere Pro.
So it makes it really easy for me to go in and search, for example, for templates for text presets. So let's say we wanted to try these text presets. You can click on download, click the file and it will begin to download. So because this is a preset, we need to actually go to effects and right click on the presets folder and import the presets that we just downloaded. And all of them are now here for you to keep. Let's see them in action. Let's try the blur scrolling down. And this is what it looks like. Very nice, smooth blur motion. So let's try another effect. Let's duplicate the adjustment layer and let's remove these preset effects that we just applied. Go back to effects and let's try glitch number one. Nice. So you can apply a preset to every single cut point to get this final result. In today's video, you're going to learn how to create fast and easy captions in Premiere Pro. Let's get started.
See how easy that was. I use text presets all the time and it saves me a ton of time. And I think my favorite part is that once you download, it's yours to keep for all your projects forever. And it's royalty free. So you don't have to worry about any complicated licensing. And Storyblocks has more than text presets. If you go to the panel, you can see here you can search by HD and 4K footage, audio, as well as images. One thing to note about the panel is that you do need a Storyblocks pro plan to be able to use it in Premiere Pro.
But you can still go to the web browser version of Storyblocks and browse their other flexible plans and download as much as you want. From there, I put a link down below if you want to go explore Storyblocks. And now let's go ahead and show you some easier animations using a.
Descript Ai Subtitles
All right. So the first app is called Descript. We're going to create a new project and we can give it a title and choose a file to transcribe. So I'm going to choose this little snippet here.
And the thing that's really cool about Descript is that it's text based. So you can edit your video using text. This is what sets it apart. So obviously, because it's text based, the captioning is really easy to do. So we can choose a speaker name and press done. So as fast as creating our caption and I see one typo, I want to fix that. I can highlight it and correct it. And I'm going to add an E, correct. So now the captions is really easy to do.
Go up to this text icon, click on captions. And now we have our captions. Learn how to create fast and easy caption. But there's no animation. But watch this. We can go over here to captions and then we can update the font. Let's try this font here. And then underneath live text, this is the animation. We can click here and underneath this dropdown, we can choose what is called karaoke.
And this will highlight the word as I speak it. So I can change this background to any color. This is just the default blue. And we can also choose to make the future words a little bit more transparent, which is what it's done. So you can see here it's at 50 percent transparency. So that way it'll get filled in as we talk. So let's see how this looks in today's video. You're going to learn how to create fast and easy captions in Premiere Pro. Let's get started. I mean, it looks great, right? And it's very clear what's happening with this text. And I think that's the most important thing with your captions is to make sure that it's easy for your viewer to read. And Descript does it so beautifully and so elegantly. And this is the free version, by the way. So you can go ahead and try it out. I put a link just down below and see how it works with your workflow. I'm going to start using Descript for captions because the animation is so easy.
Captions Ai App for Phone

The next AI app is for your phone, and it's called captions. And I believe right now it's only available for iPhone iOS. So the way it works is you just click on create and then you can click on import your footage. And I have the footage right here. Continue. Proceed with English. And then it starts to upload this and prepare it for the subtitles. So right now you can see that already it looks great. It's animating to what I'm saying. And each word is highlighted in yellow when I say it. So it's very accessible. And we can click on this button, auto edit AI, and you can click on automatically add engaging captions, which I have on. You can have it automatically trim blank spots, which have kept off. You can also add emphasis to words. So if we select that, turn it on and I'll show you in a second. And then if you want it to include emojis so you can have it include emojis on top of the footage. And now let's go back and see how it looks.
So it added some emojis.
And. So.
So.
and it added some emphasis and you can change the color so we can go to color and change the emphasis to a different color. For example, if we want it to be kind of a magenta color and then hit save, and this is what it looks like. So I personally think the emojis are kind of distracting. So I'm gonna actually turn those off and I'm also going to turn off the emphasis 'cause I think it looked good just before. But you see how fast this was?
Final Thoughts
And then all you have to do is hit save and then you just save it to your camera roll and you can upload it to Instagram, Reels or TikTok. It's great for vertical video, but it works with any type of aspect ratio. So if you're looking for some quick animations, just send it to your phone and then you can export it out and upload it to whatever channel you need to. So those are all the tools for this video. Once again, I put a link to everything just down below if you wanna review what apps and what presets I used in this video. As you can tell, doing it manually is the longest, but you can create your own design from scratch. So it's important to know that Premiere Pro gets you halfway there with the auto transcription and the auto captions, but the only thing missing is that automatic AI animation to what we're speaking. And we saw that with the script, right? And the text presets from Storyblock certainly help, but I would love to see the AI in there. And of course, if you're doing vertical video, I recommend the captions app.
So if you use any other AI subtitle makers, be sure to leave a comment below. And if you want some more videos like this, be sure to give it a thumbs up as well as subscribe. Thank you so much for watching. And as always, keep creating better video with Gal. See you next time, bye.