What is the Cyber Monday Deal?
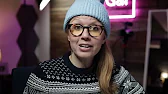
In today's video, I'm gonna review a few new products from AE Juices I Want It All bundle in After Effects. And the Cyber Monday sale is still on now, so you can get 98% off the I Want It All bundle, as well as 50% off the individual packs. And if you use my link below, you can get an additional 10% off the sale price. All right, let's go ahead and jump on in.
Last Friday I did a review of a few products from the bundle inside of Premiere Pro. So you can actually use this bundle and the different effects in whichever program that you prefer. So if you want to check out the Premiere Pro review, you can click right up here. I look the same. I just have a different colored hat on. So here I have opened the AE Juice Pack Manager inside of After Effects. And I'm going to show you first the digital screen constructor.
Digital Screen Constructor
You can see here there are a bunch of different categories from pre-constructed buttons to headlines, main screen text, like if you're showing an article, Twitter, and some UI elements. And so all of these constructors just make it super easy. You just have to type in your text, change the color, and you can insert these into a documentary or a commercial that you're working on. So let's say we want to use one of these site ones. So let's preview them. And you can always make this bigger, pull the window down and increase the size of the preview to get a better look here. So for the digital constructor, let's say we want to use site 02. Double click and it will import into the composition that you have opened. So it automatically imported here into my composition that I had open. If you didn't have a comp open and you're new to After Effects, you can go to your project panel just like in Premiere Pro. And you can right click and create new composition. And then from here, you can choose the width and the height, which is, you know, the resolution. Or you can use one of the preset dropdowns here. If you're like, oh, I'm not sure what the resolution for 4K is, you'd actually press the multiply symbol, the little asterisk, and times this by 2. And then do the same with the height, times it by 2. And now you have a 4K resolution, which is really a neat tip to know about. So it imported site to automatically my comp and it has sound effects as well. So how do we edit this? Just double click on the comp itself. And then there's a text holder here. Double click to open this up. Press H, the hand tool to just situate it better in frame and then go back to the type tool here. And we can type out Premiere Gal.com. And you're probably going to have to move the playhead over to see the full result to make sure that you spelled it correctly. Now, when we go back to site 2 and you can see it cuts off.
If you want it to stay longer, we can actually expand the work area. So see this little handle here? Let's drag this out.
So there we go. Now we have our premieregal.com constructor and a couple more things. If you go to controls and go up to effect controls here, you can choose if you want that digital screen overlay. So before it had this kind of digital screen interface, which looks really nice, but if you don't want this, you can check this on and it will remove it from the screen. And there's a few other options here, like the background colors, which you can change a control like elements. So what if you're like, oh, I want to bring this into Premiere Pro to put it as a part of my edit. There's a couple ways to do it. There's something called dynamic link. So what you can do is like actually bring over Premiere. I have Premiere open here. You can actually drag this comp itself into Premiere Pro and now we have this link comp, which we can then right click and create a new sequence from the clip, but you can see that, you know, there's the red bar here and you know, it doesn't play back that smooth and you have to render it out and it takes a long time, which is why I actually prefer to just export it here in After Effects and then send it to Premiere Pro. If this video is helping you out so far, be sure to give it a thumbs up as well as subscribe and don't forget by using my affiliate link below, you can get an extra 10% off the Cyber Monday and the Black Friday deal for AE Juice and it helps support the gal community. So thank you. If you want to get a feel for what the panel is like before you purchase, you can actually go to the link in my description to download the free plugin, the starter pack where you can get a little taster of the different elements as well as some sound effects. And then if you're like, yeah, duh, I want this. You can go ahead and purchase the full thing after you get a taster of it. I also want to thank Epidemic Sound for providing the music and the sound effects for this video. They also have Cyber Monday Black Friday deal going on. And if you want to look at all of the Cyber Monday deals, I put a blog post just down below, but the deal with Epidemic is you can get 75% off and you can get 30 days free. Thanks Epidemic for the awesome music. Now, let's go in to the next effect, the Prism package.
Prism Effects

You can see that it creates this kind of double-ization and kaleidoscope effects with some cool light leaks. So let me show you how it works. So you click on Prism and you can see there's bake, bake. You can see that there's basic prisms that you can choose from that have different variations.
There's the broken prism effect kaleidoscopes, which look very cool. And I think some of these effects could actually be good to create some like psychological effects. I already have the footage here inside my comp. All I have to do is double click and let's play it back so we can get that multi-frame rendering preview. It's at full resolution. This is not real time. It's rendering out and you can see that it created some chromatic aberrations on the side and it duplicated her and added some opacity so I could see this being used in a music video, for example. All right. This is how it looks fully rendered out. It just looks super cool. And let's try out one of the special prisms as well. And let's double click to download it. And here we go. It automatically applies it to the clip. But what if we want it to appear over time? What we can do is press T on our keyboard to bring up the transparency and let's say after a second or so we want it to be at a hundred percent so we can click on the stopwatch to create our keyframe that we can go back in time and reduce it down to zero. So now let's just hit play to render it out. All right, so this is how it looks.
Yeah.
Yeah.
Yeah. Yeah. Yeah. Nice little split personality thing going on here. So next up is animated markers. First, I'm going to take this footage clip and drag it into the comp icon here to create a new comp from this clip.
Animated Markers
Then I'm going to go to my AE juice pack manager and let's go to animated markers, which is this pack here. Now, these animated markers, essentially, there's this kind of like squiggly, scratchy alphabet letters, arrows, circles, faces, lines, numbers, scrambles, shapes. There's viewfinders and some transitions, all sorts of cool things that you can overlay. So with all of these different animated markers, you can produce some really cool commercials and some music videos that stand out. The first one that comes to mind is the Where Are You Now music video with Justin Bieber and Skrillex and Diplo. So let me show you how it works here. Let's say that we want to add a smiley face to the girl's face. But this is where after effects tracking comes in handy for tracking. It's best to create a null object. So control click or right click in this empty space here. Select new null object and this will create a new null. Select the video clip itself. We're going to select track motion. And in this case, we want to zoom in. So I'm going to use a little slider on my mouse just to zoom in. And then I'm going to move this inner circle over her eye to track her eye. And then I'm also going to track the rotation. And we can use this track point on her lips here and scale. And then in terms of edit target, we want to make sure that it's going to put the motion on the null object itself that we just created and press OK. And then we're going to analyze forward.
And whoa, that was fast, eh? So when it turns around, the tracking is lost and that's OK. We're not going to have the clip last that far. All the tracking is done and now we're going to hit apply and press OK. So now what we can do is we can go here to the faces and let's say we want to apply face to let's double click and we need to scale it down. So my recommendation is to press S and it will bring up the scale controls on the layer.
And then you can scale this down to fit the size of her face and bring it on top. And we could rotate it slightly. Let's actually press R on our keyboard and we can rotate it. Press shift when you scale it from the actual comp window. So now if we want this to stay tracked to her face, make sure we go back to the frame where we place the smiley face, then from parent and link, we can choose null on the face.
So it'll use all that motion that we tracked on the null object and apply it to the face. So now as we play this back, you can see that it stays glued to her face. So another thing that we can do is we can do rotoscoping and after effects. Let's say we want some drawings to happen behind her, not on front of her. So select the arcade clip and we're going to go up to the rotor brush tool and we actually need to go to the layer itself. So if we double click on arcade clip here, go to the layer and actually draw on her to remove her and separate her from the background. So I'm just going to draw over her and the rotor brush tool will do a pretty good job at auto detecting edges. But of course, because it's very similar colors, we're going to have to make some tweaks here. So once we have it selected, we can press option or alt on a PC to deselect the areas that we don't want selected, such as inside here in her arm. And then we can press play spacebar on our computer and it will go forward and it will start to rotoscope and it may make some mistakes like here. It's catching this. We don't want that. Let's remove that. All right, so let's say the rotoscope is done. It's good so we can go back to the composition and now we can see we have our roto. What we can do now is we can actually duplicate this clip command D to duplicate it and then the bottom clip we actually want to remove the effect. So that way we have the background still and then we can put something between her and the background so we can go back to the ages pack manager and let's go to circles and I really like the circle that kind of is growing. So let's double click and this will download and import and we can actually move this circle between the two clips so that way the circle is behind her and let's actually move this over.
So now it's behind her because we did the roto. Let me show you the final effect up here so you can see I just added in this case. A heart here and I added some transitions. To animate them on screen, I just use the built-in effects from the animation presets. Some in and out animations to these elements here so you can see the scramble animates in on top of the heart.
So using the power of tracking inside of After Effects as well as the rotoscoping, you can create some really cool effects with these animated markers inside of After Effects.
Final Details
So these are just three out of the 50 plus products in the entire I want it all bundle which is compatible with both After Effects and Premiere Pro and you can get all of this for just $149 during the Cyber Monday sale and you can use my link below to get an additional 10% off.
If you have any questions about the AE juice, I want it all bundle. Just drop a comment just down below and if you want to learn how to use AE juice bundle inside of Premiere Pro, you can click over here and over here you can click to sign up for my super pure live workshops. Thanks so much for watching and as always keep creating better video with Gal. See you next time. Bye.